Full guide
How TileSnap works
Capture
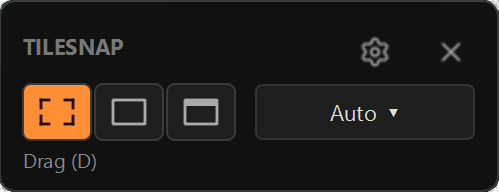
Capture modes
- Drag: press the capture hotkey, then drag a rectangle over exactly the area you want.
- Fullscreen: press the hotkey, then tap F to grab the entire screen instantly, no dragging needed.
- Window: press the hotkey, then tap W, then click a window to capture just that window. Works correctly on DPI-scaled monitors (125%, 150%, ...).
- While the capture overlay is open, tap D, F, or W at any time to switch modes before you finish the capture. Esc cancels.
- TileSnap remembers whichever mode you used last, so the next capture starts in the same mode.
Output size
Presets & tokens
- Auto: picks a sensible size automatically based on how big the capture is.
- 512 / 1024 / 1536px: force the scaled copy to that maximum size, whatever the capture's original size.
- Original: no scaling at all, the full captured resolution.
- No upscaling, ever: if a capture is already smaller than the chosen preset, TileSnap leaves it exactly as-is. Scaling only ever makes an image smaller, never bigger.
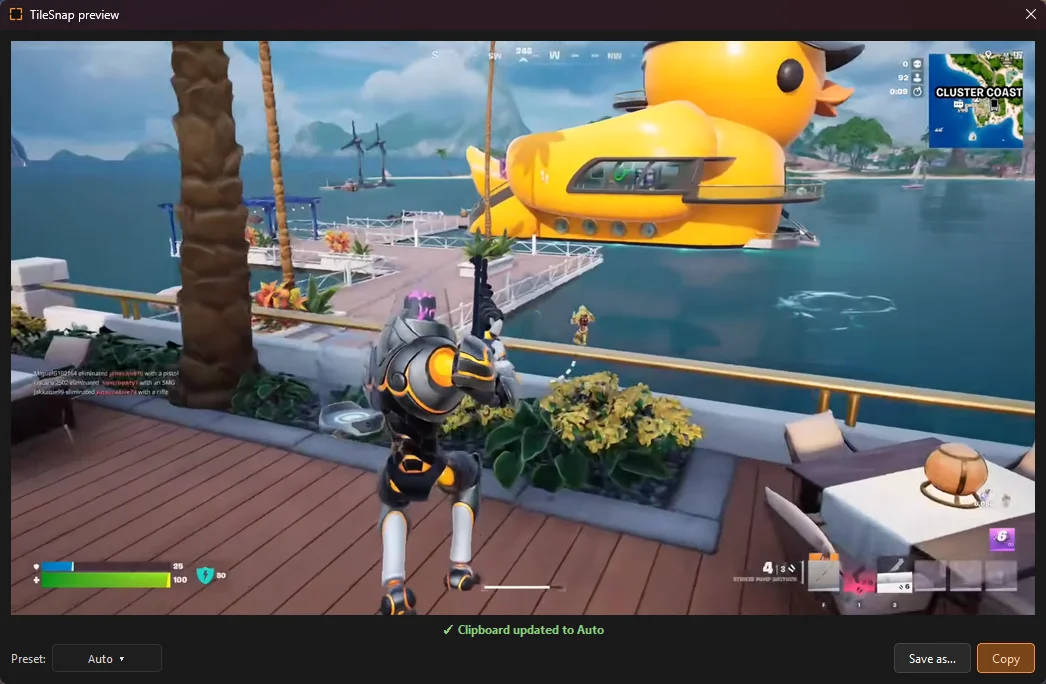
- You can switch presets after capturing, from the preview window, without redoing the capture.
| Provider | Original 4K | TileSnap 512px | Reduction |
|---|---|---|---|
| OpenAI high detail (GPT-4o) | 1105 tokens | 255 tokens | 4.3x fewer |
| Claude current top models | 4784 tokens | 209 tokens | 22.9x fewer |
Right after capturing
Post-capture panel
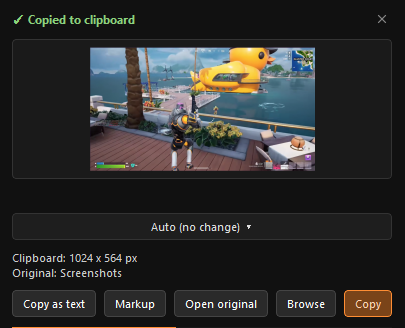
- Appears automatically after every capture (unless turned off in Settings, in which case you just get a short "Copied to clipboard" confirmation instead).
- Preset dropdown: change the output size after the fact — the image is instantly reprocessed from the original and re-copied to your clipboard, no need to recapture. Also remembers your choice: it updates the same setting the capture toolbar's own preset picker uses, so your next capture starts with whatever you last picked — the two pickers stay in sync.
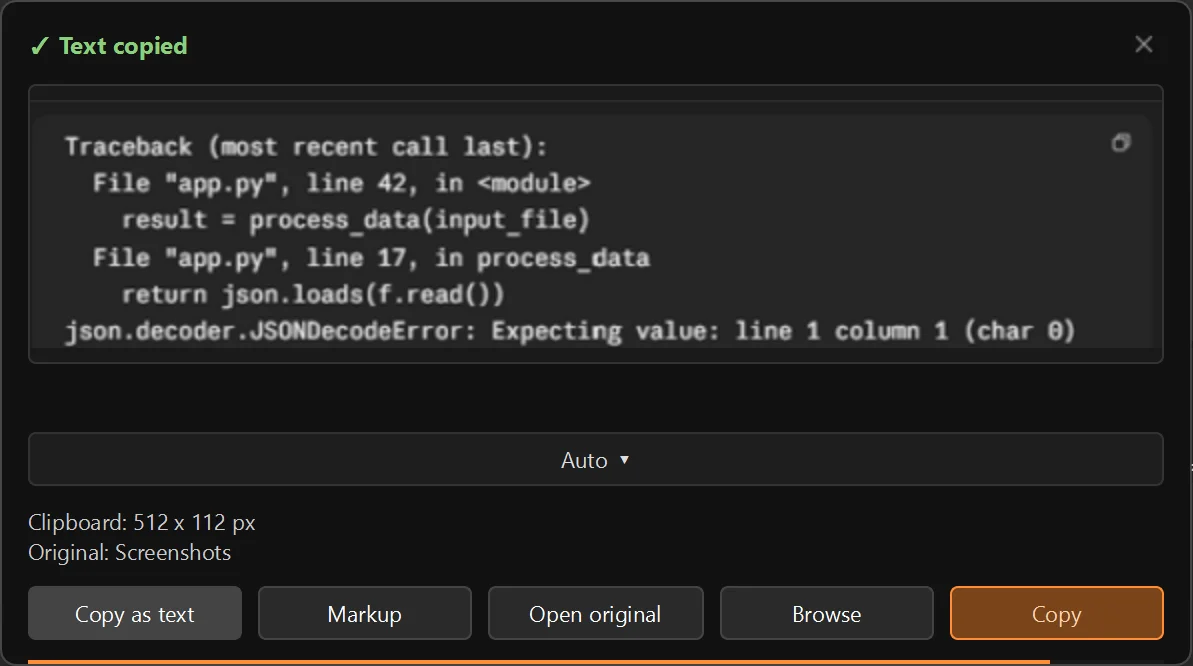
- Copy as text: runs OCR on the capture and copies the recognized text instead of the image.
- Markup: opens the full-resolution original in the markup editor (crop, highlight, arrow, redact).
- Open original / Browse: opens the saved full-resolution file, or the folder it's saved in.
- Copy: re-copies the scaled image to your clipboard. Usually not needed — TileSnap already copies it automatically the moment you capture, before this panel even appears.
- Click the thumbnail to open the same image in a larger preview window with the same preset dropdown.
- Auto-close timer: the thin bar along the bottom counts down how long the panel stays open before it auto-closes. Change that duration (3 / 6 / 10 seconds, or "Stay open" to disable auto-close) in Settings.
Annotate
Markup editor
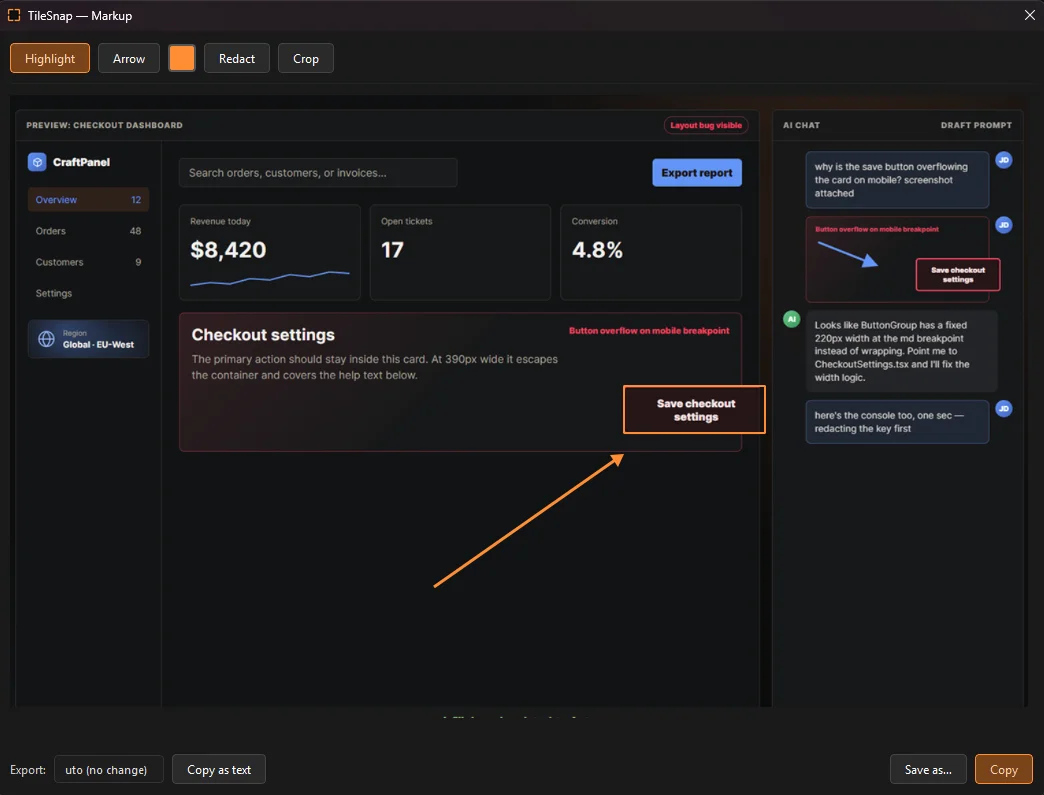
- Crop: draw a rectangle to crop the capture. After drawing, drag any of the 8 handles (corners and edges) to fine-tune it.
- Apply crop: a floating button appears just below the crop rectangle; clicking it cuts the image immediately. The canvas shrinks to the new size, and any highlights or arrows you already drew are repositioned to match.
- Highlight: draw a semi-transparent box over something you want to draw attention to.
- Arrow: draw an arrow pointing at something specific.
- Redact: draw a solid black box over something you want to hide, for example a password or API key.
Beyond images
Text copy (OCR)
- Separate from the screenshot flow: click Copy as text in the post-capture panel or the preview window to turn the visible on-screen text into clipboard text instead of an image.
- Runs on Windows' own built-in text-recognition engine. Nothing is uploaded anywhere.
- Useful for error messages, log output, menu labels, or settings panels you want to paste as real text into an AI chat, instead of asking a vision model to read it from an image.
- Text is also cheaper: a short block of recognized text usually costs far fewer tokens than even a small scaled screenshot.
Configure
Settings & Pro
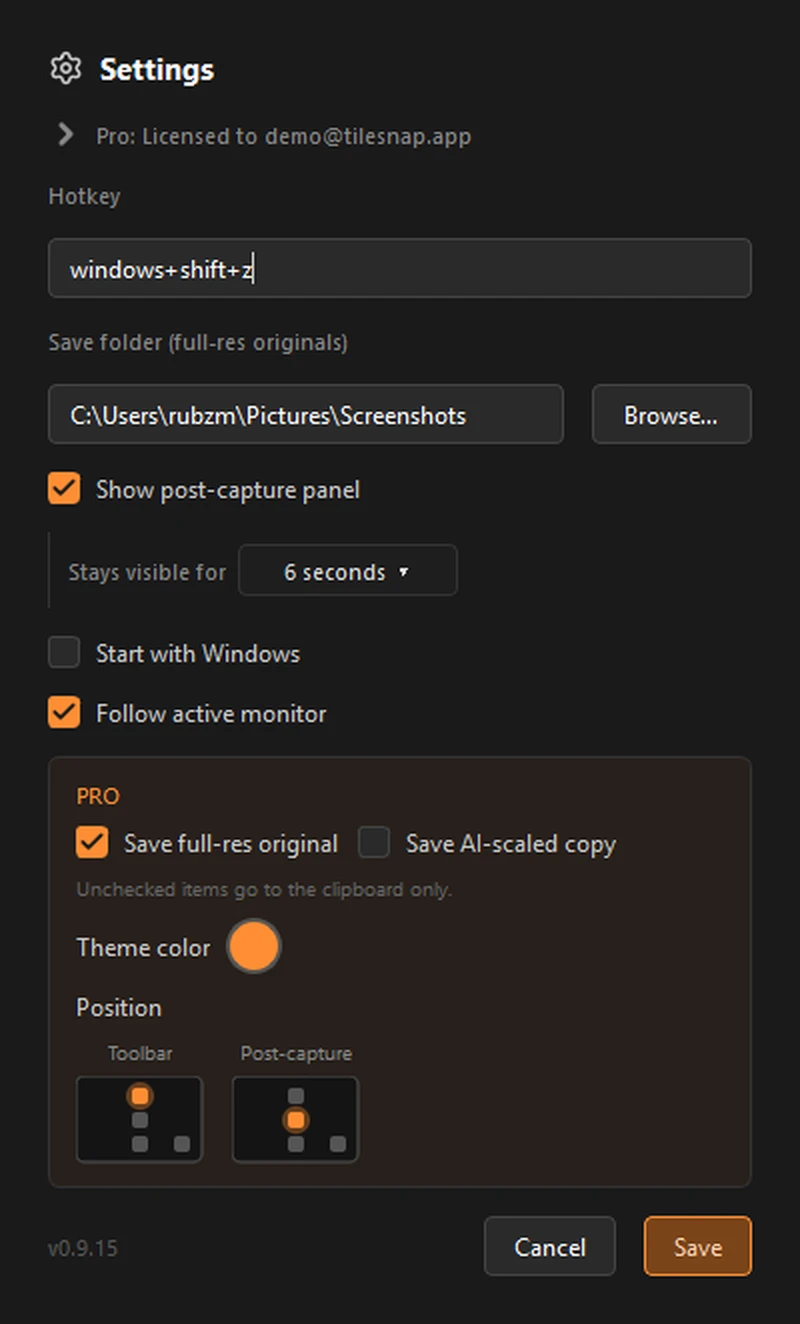
- Hotkey: change the global capture hotkey (default Win+Shift+Z).
- Start with Windows: launches TileSnap automatically at login. No admin rights needed.
- Save options (Pro): choose to skip saving the full-resolution original, save the scaled AI-ready copy as a file too, or both.
- Theme color (Pro): pick a custom accent color for the toolbar and markup tools.
- License key: paste your Pro license key here to unlock unlimited captures. Settings shows your Free/Pro status, and the email your license is linked to once activated.
Hotkey not working? Make sure it isn't already claimed by something else, like PrintScreen or Win+Shift+S (Windows' own screenshot shortcuts) or Ctrl+Shift+S (Adobe's Save As in Photoshop/Illustrator/After Effects).
Windows warns "Unknown publisher" during install or update? That's expected: TileSnap isn't code-signed yet, a deliberate, temporary cost trade-off for a small indie tool. Click "More info" then "Run anyway" to continue. Every purchase brings us closer to affording a code-signing certificate, which will remove this warning entirely.
Blocked entirely by Smart App Control? A small number of fresh Windows 11 installs run this stricter mode, which has no "Run anyway" option. Turn it off under Settings > Privacy & security > Windows Security > App & browser control > Smart App Control, then install TileSnap.
Chrome says the download is "not commonly downloaded" and blocks it? Same root cause: TileSnap isn't code-signed yet, and Chrome's Safe Browsing flags less-downloaded files as a precaution. Click the download in Chrome's download bar, then "Download suspicious file" to continue.
Always ready
Running in the background
- Closing the capture toolbar doesn't quit TileSnap: it keeps running in the background, ready for the next hotkey press.
- Look for the TileSnap icon in the system tray (the small icons near the clock, bottom-right of your taskbar) — click the little up-arrow there if it's hidden.
- Right-click the tray icon for Settings, Help, Open last capture, or Exit (this is the only way to fully quit TileSnap).
- Double-click the tray icon to start a capture, same as the hotkey.
- On first run, a notification appears confirming TileSnap is now running in the tray. It stays on screen until you close it with the X, so you won't miss it.
Reference
Shortcuts
| Shortcut | Action |
|---|---|
| Win+Shift+Z (customizable) | Start a capture |
| D | Switch to Drag mode (while the capture overlay is open) |
| F | Switch to Fullscreen mode (while the capture overlay is open) |
| W | Switch to Window mode (while the capture overlay is open) |
| Esc | Cancel the current capture |